Pear curd is a delicious delicately flavoured and versatile spread that can be used in a variety of ways. Made with fresh pears, sugar, eggs, butter, and lemon juice, this easy pear curd has a smooth texture and creamy consistency.
This delicious pear spread is great for spreading on toast or scones, filling tarts or cakes, or even using as a topping for pancakes or waffles.
Made with pureed juicy and ripe conference pears, which are the most popular variety in Britain, it is sweet and gently flavoured.
This was inspired by my apricot curd recipe on this site, as I enjoy making fruit curds from all kinds of fruit, in addition to the traditional citrus fruit.
This is a microwave recipe for making pear curd – it is quick and easy! There is no need to stir a bowl over a boiling pan for ages here.
Jump to:
Ingredients
Here are the ingredients you will need to make this recipe.
Use this list to get the ingredients together (quantities are in the recipe card further down the post).
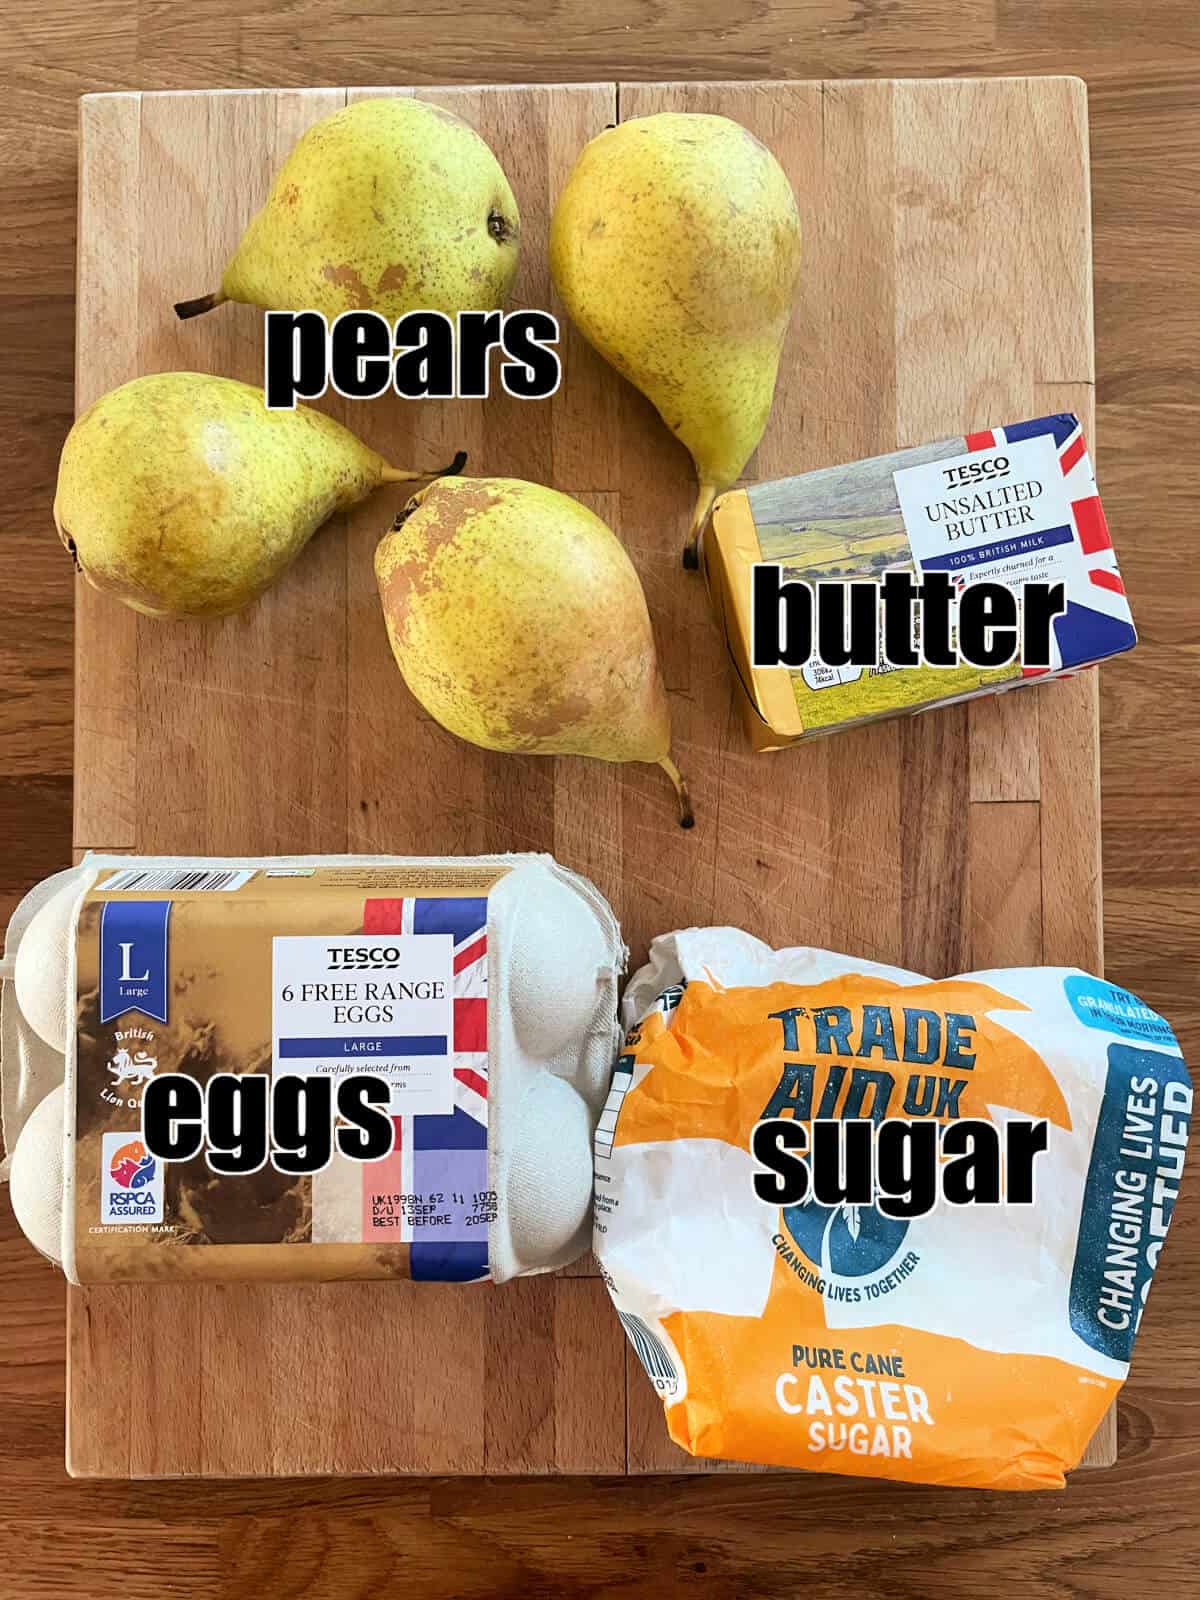
- pears – the key ingredient. I use ripe and juicy Conference pears. Choose fresh pears that are just ripe for best results.
- butter – adds richness and makes the curd smooth and silky.
- eggs – eggs give fruit curd the thick texture that makes it work as a spread.
- caster sugar (superfine sugar) – to sweeten the curd, a vital ingredient for good flavour.
- lemon juice – to prevent the pears from turning brown, also to add acidity and enhance the flavour of the pears. You can either use fresh lemon juice or lemon juice from a bottle.
Instructions
Before you start, read my step-by-step instructions, with photos, hints and tips so you can make this pear curd recipe perfectly every time.
Scroll down for the recipe card with quantities and more tips at the bottom of the page.
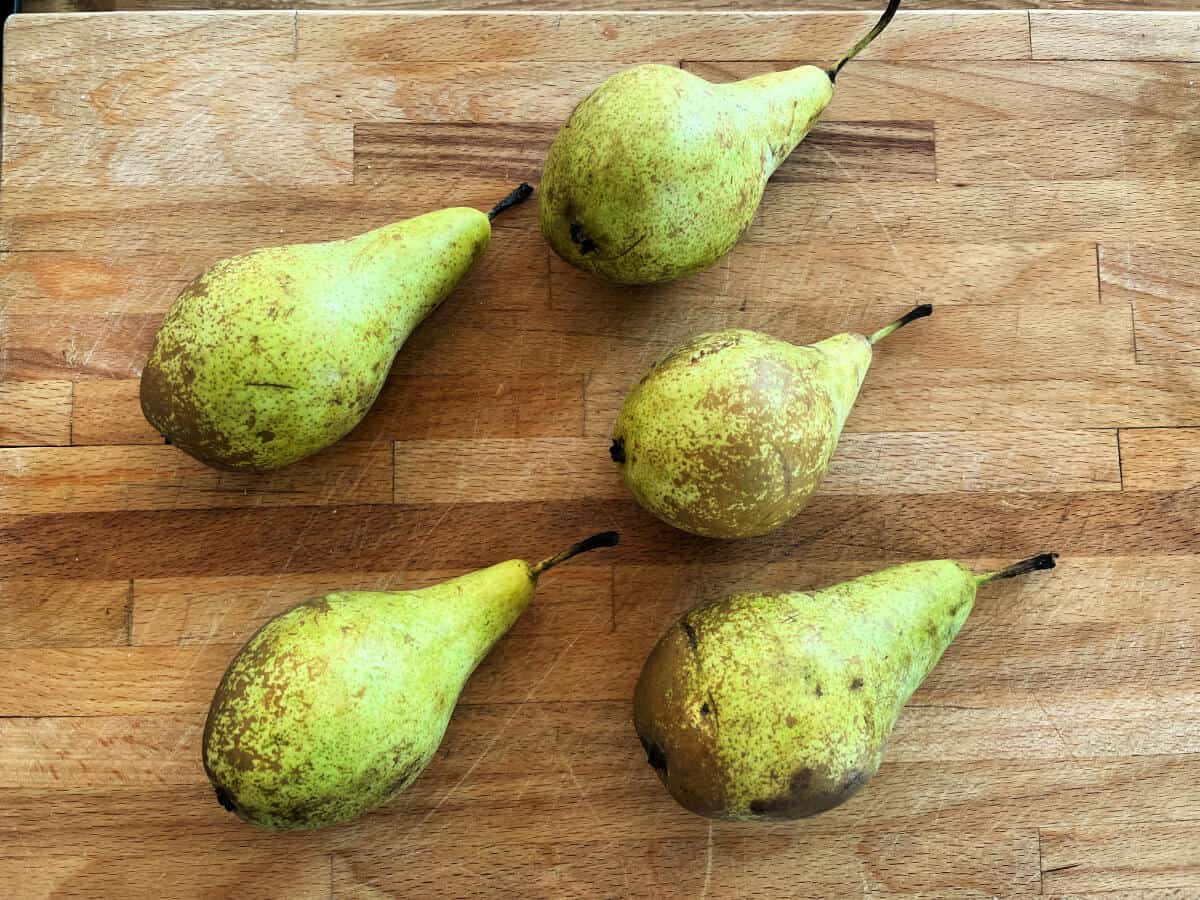
Choose ripe pears, preferably without bruising.
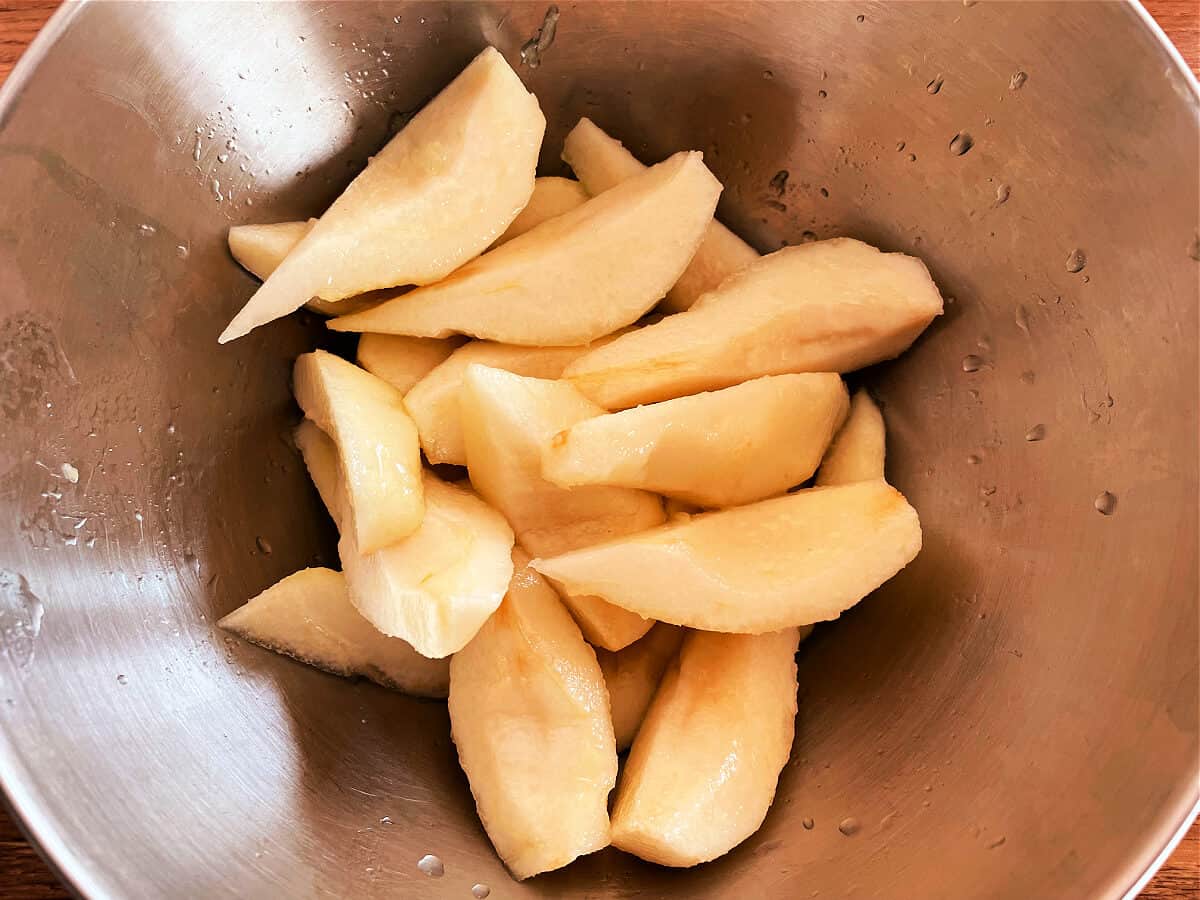
Trim, peel and core the pears, and slice into quarters. Squeeze over the juice of half a lemon (or 1 tbsp lemon juice from a bottle) to prevent the pears going brown.
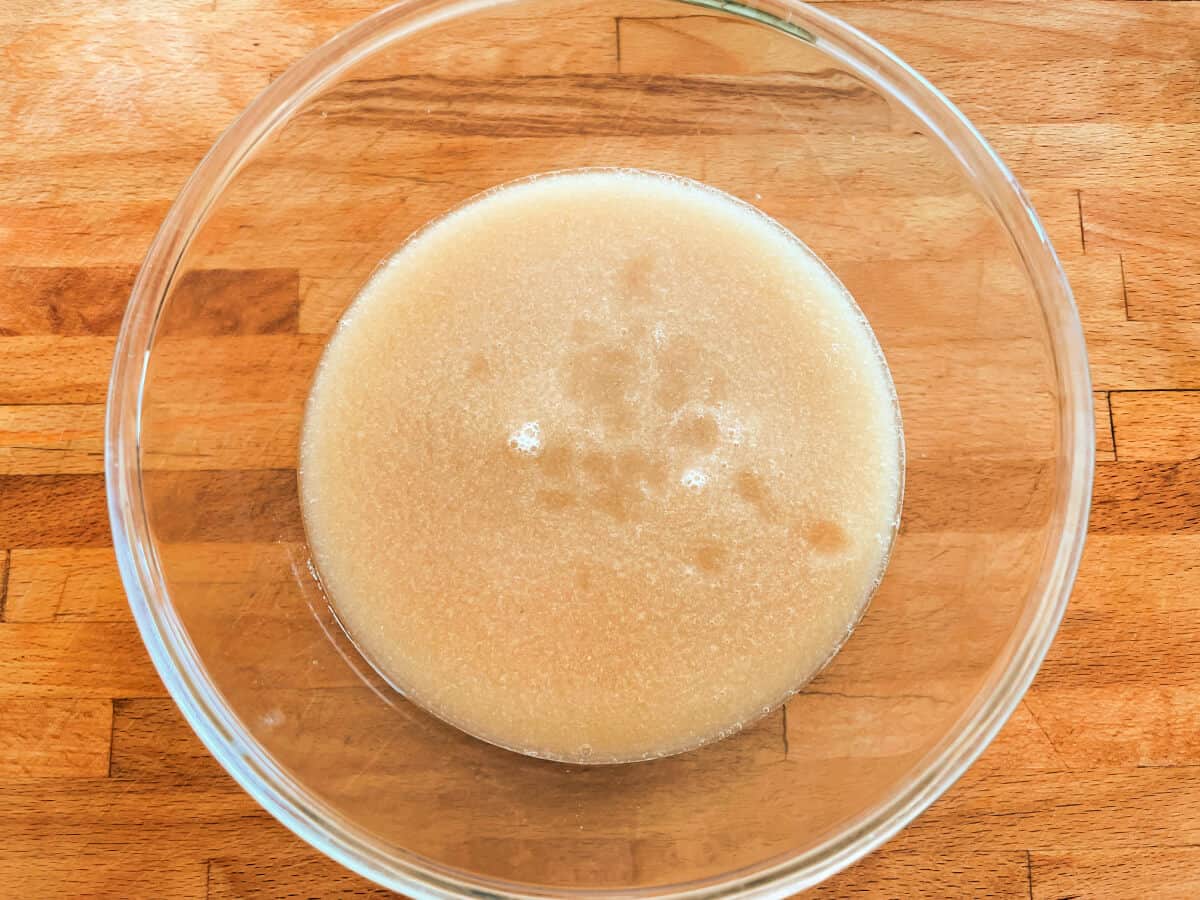
Puree the pear flesh in a power blender until smooth. I use a power blender and pulse for 20 seconds (this may take longer depending on your blender). Look for an even liquid consistency with no lumps.
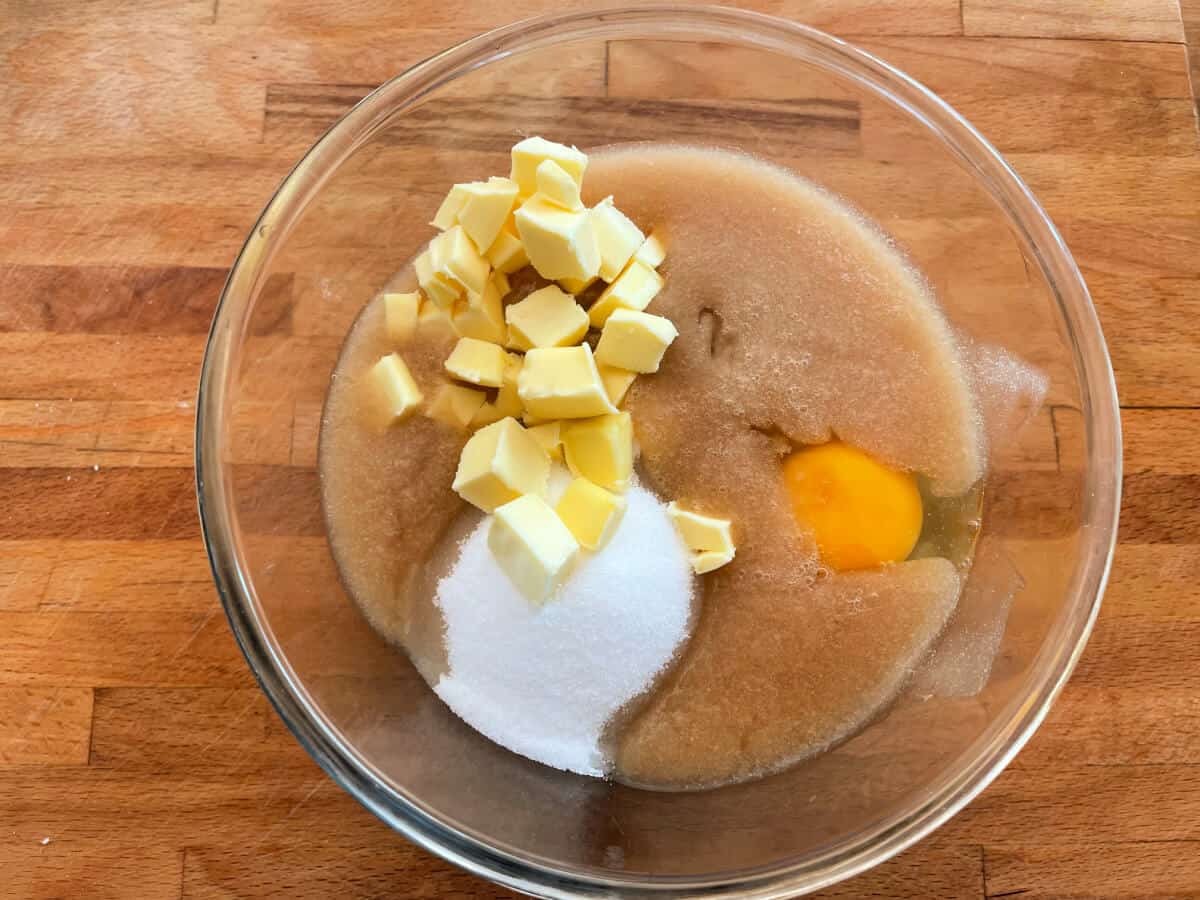
Add the caster sugar, butter and eggs. Stir. Then place the bowl in the microwave and heat on high for 1 minute, then remove and stir well. Repeat 5-6 further times, each time microwaving then stirring/beating well.

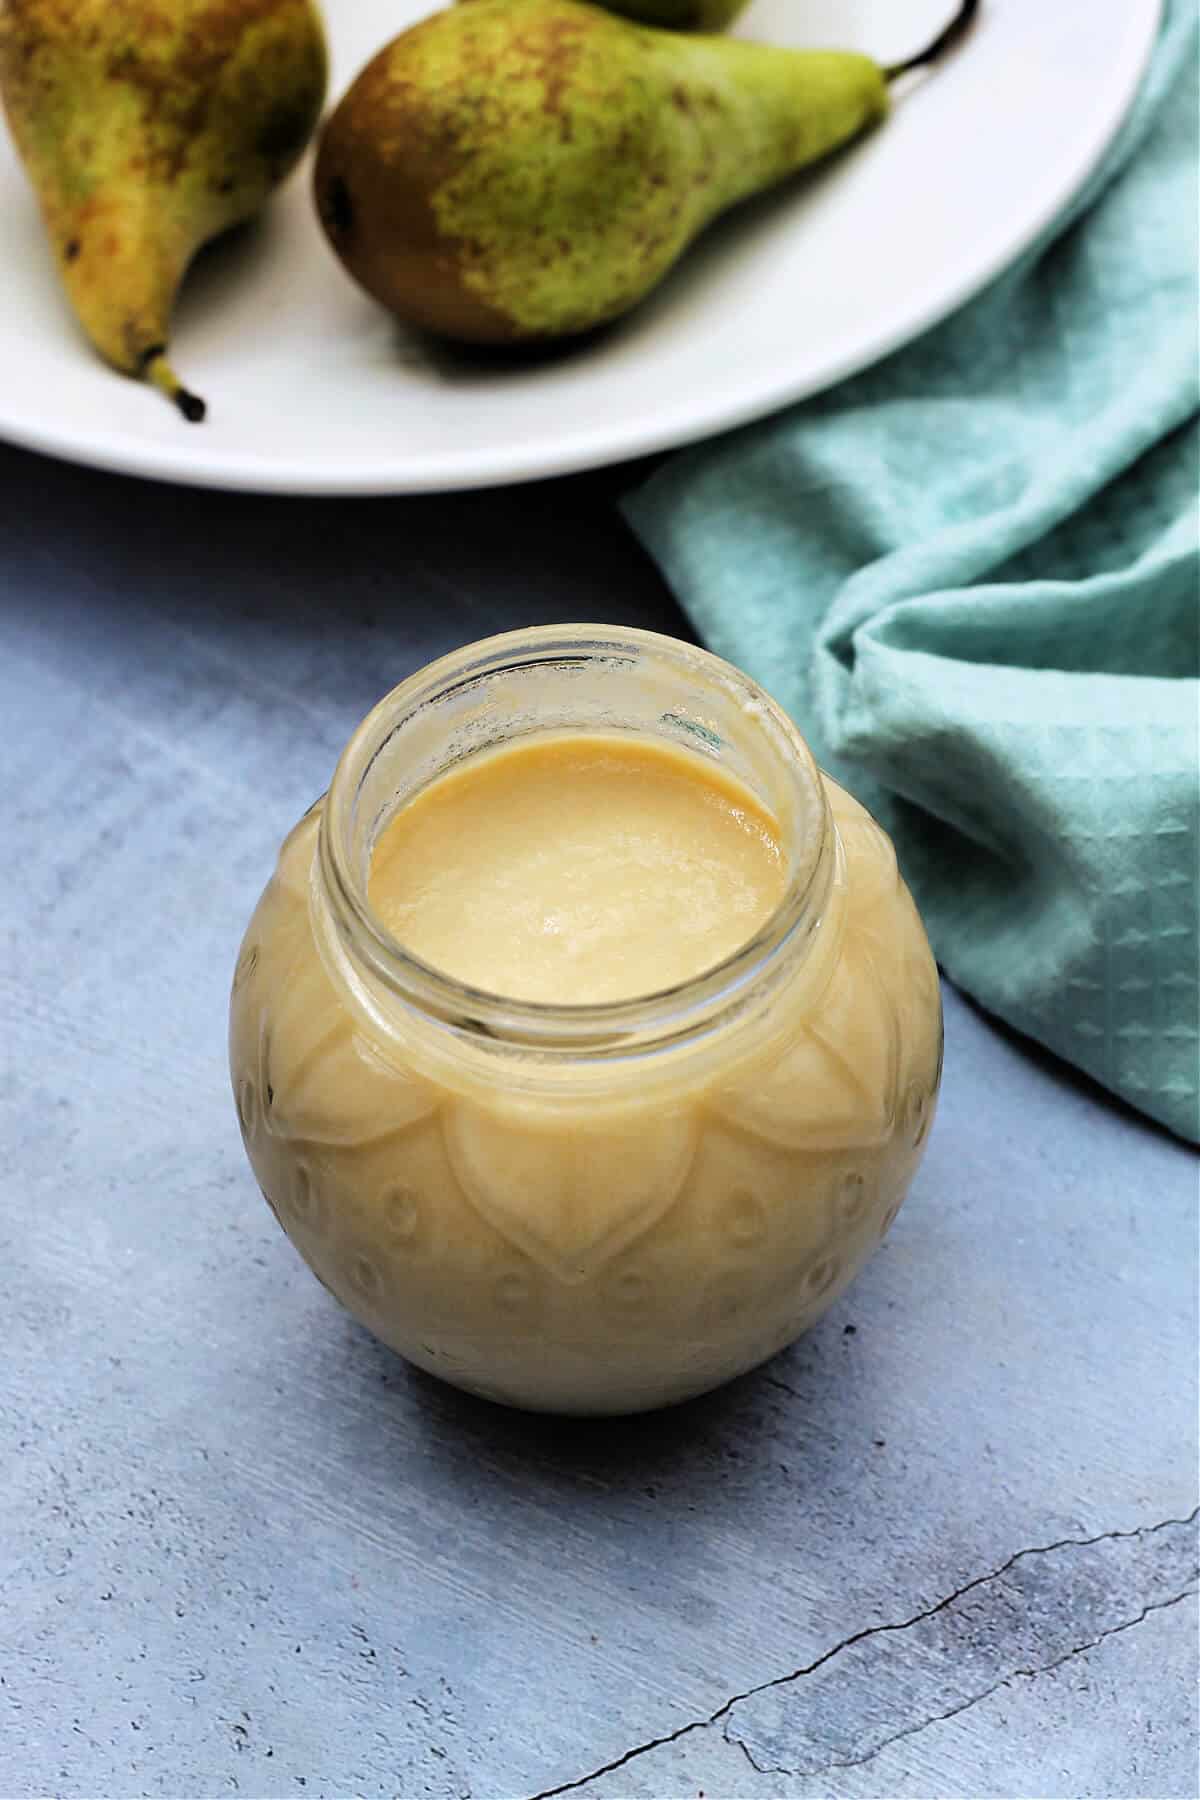
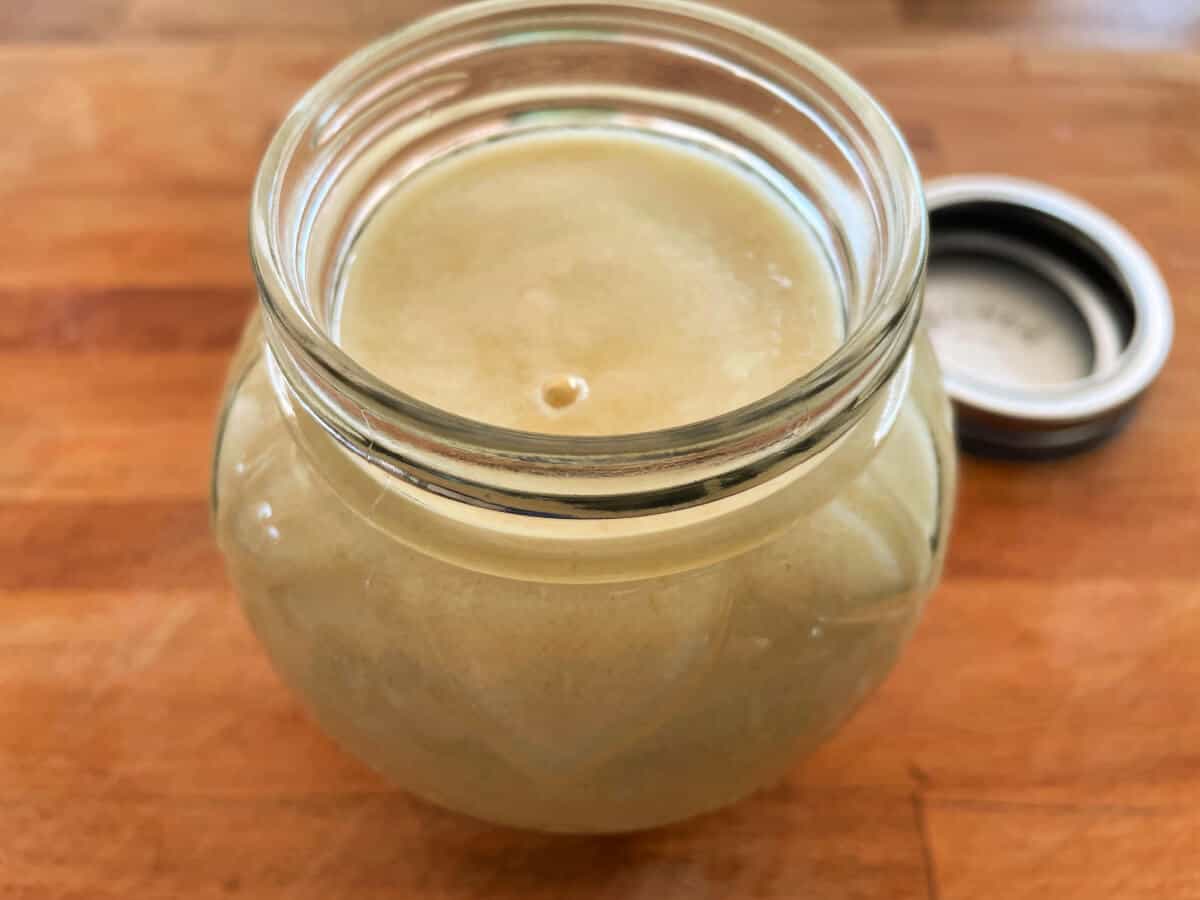
The resulting pear curd should be thick and smooth as shown.
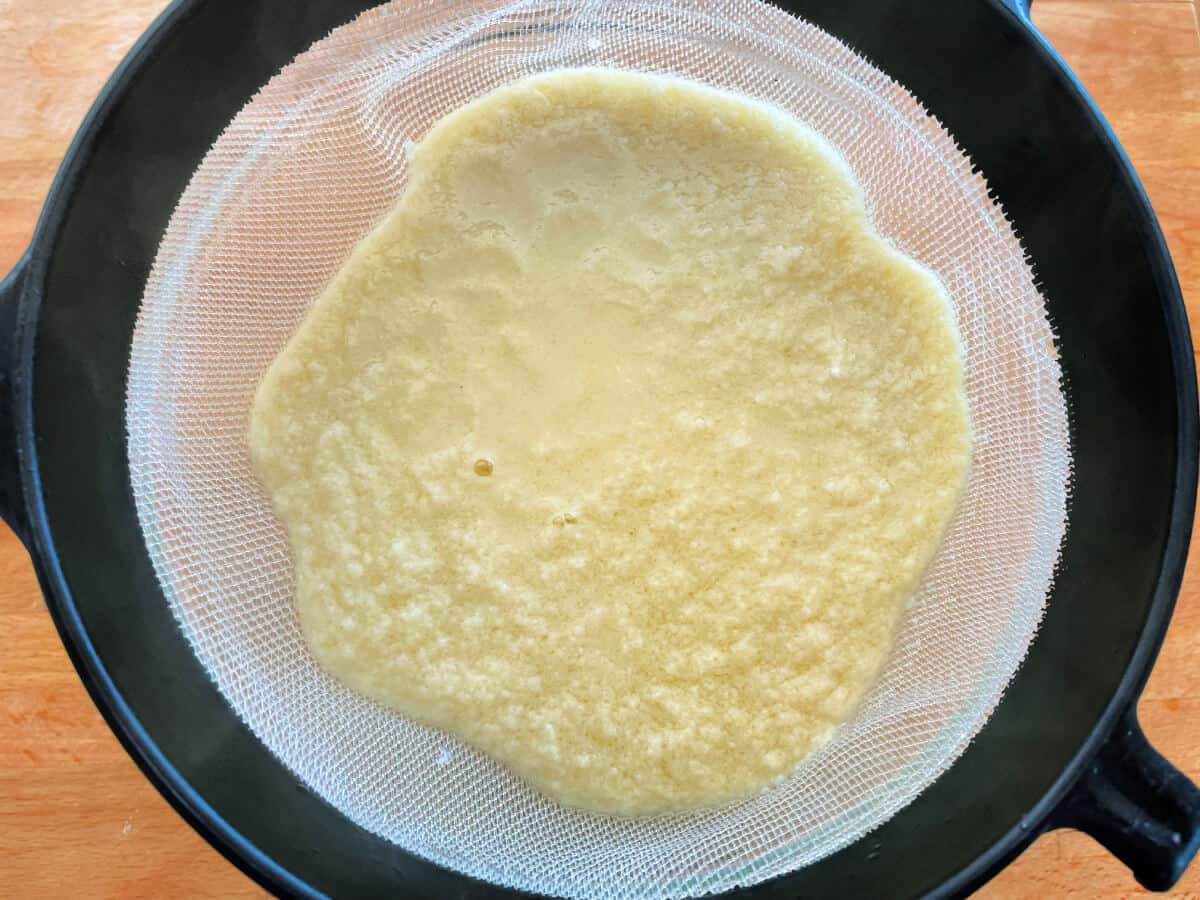
Strain the curd through a plastic sieve to remove any small lumps of cooked egg and any gritty texture.
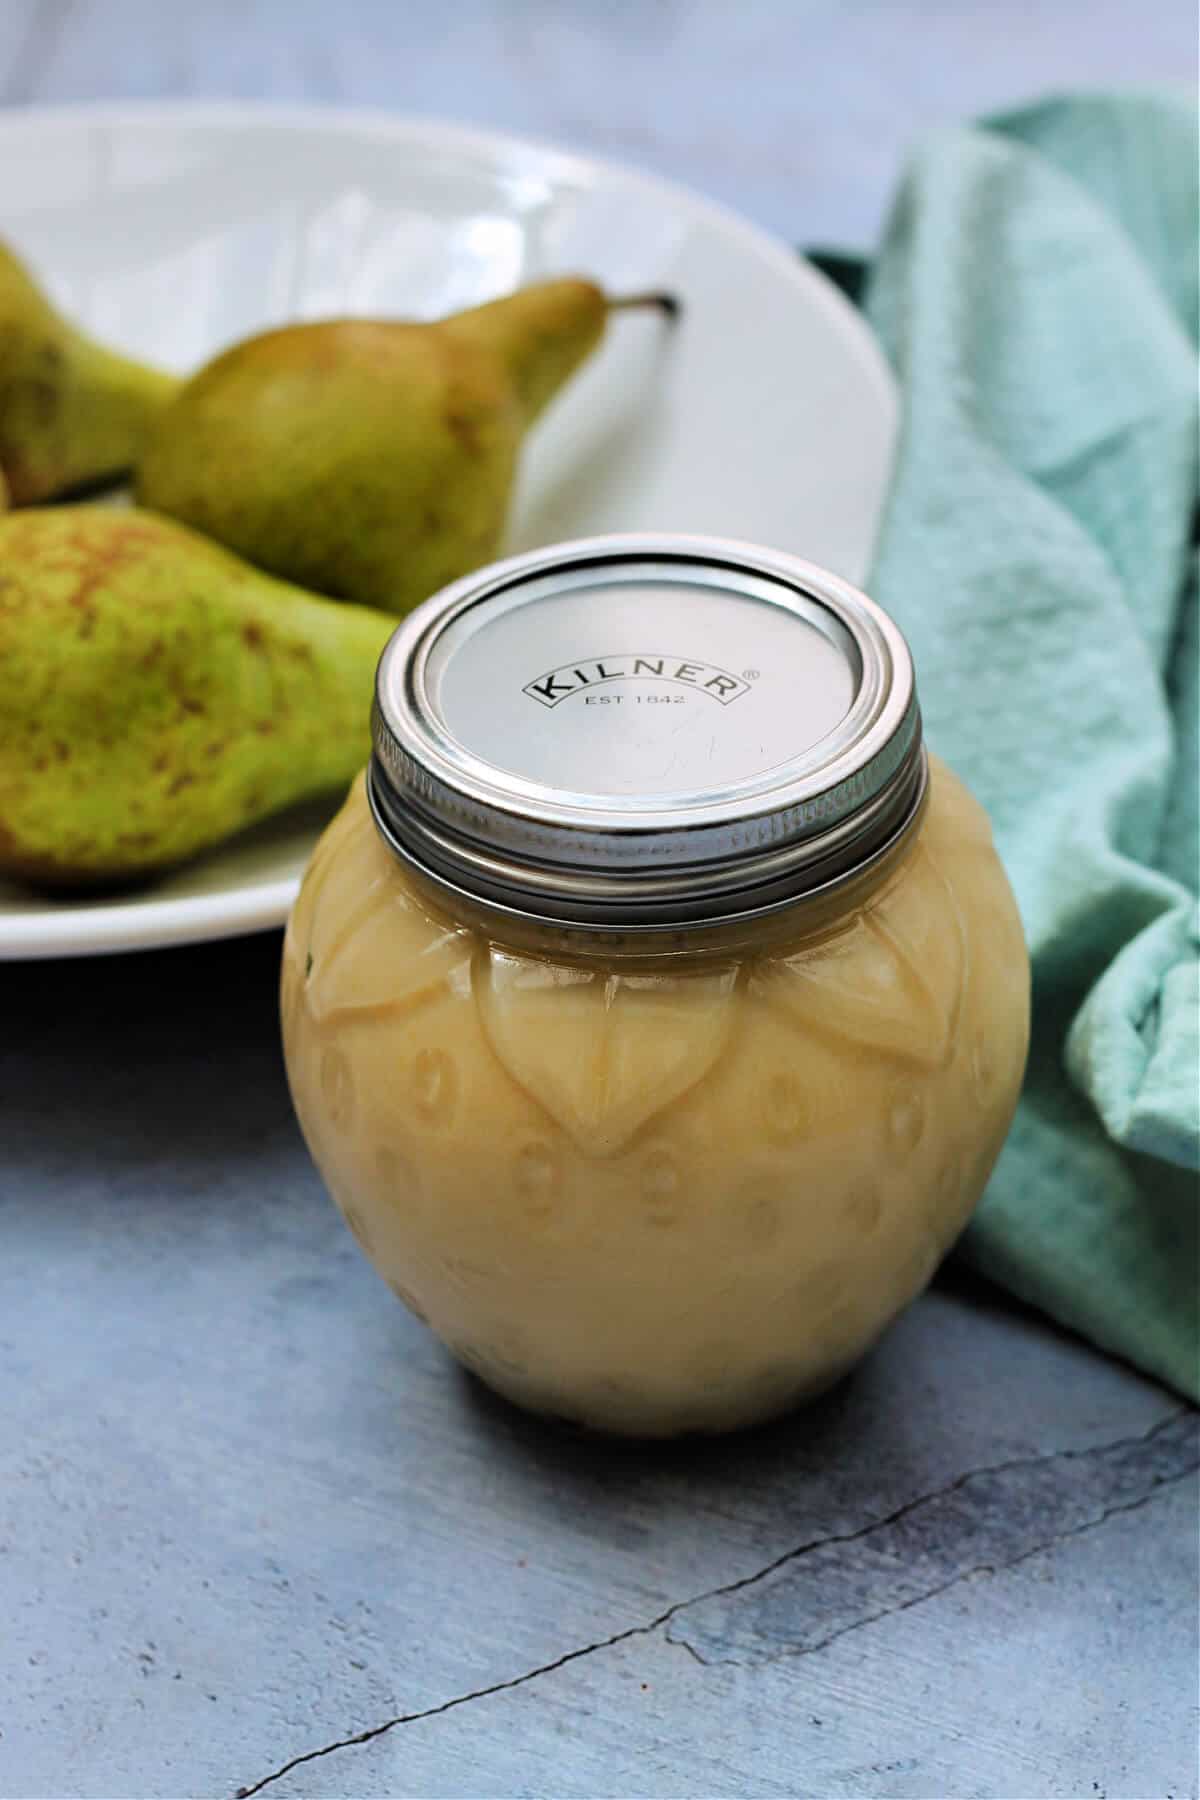
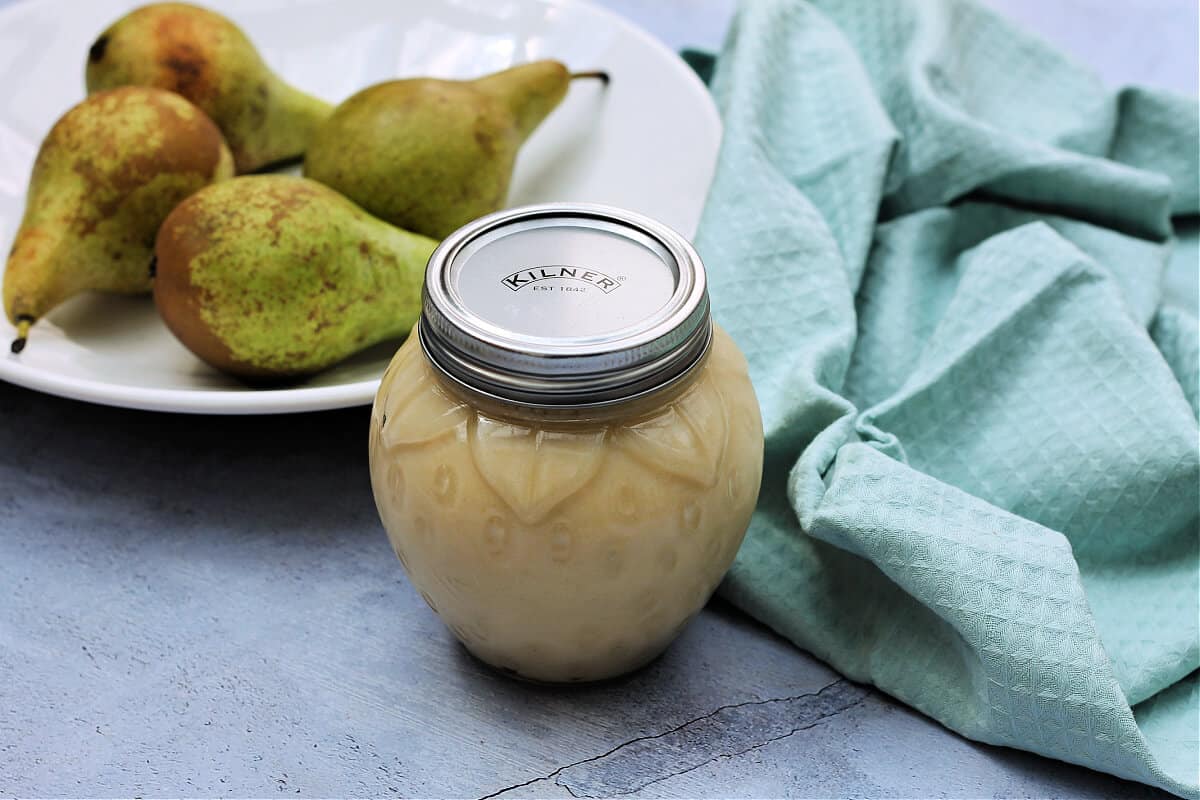
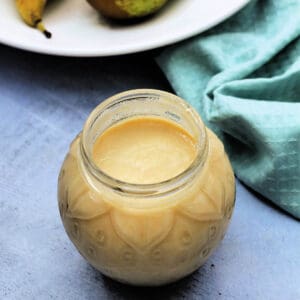
Pour into a sterilised glass jar, put on the lid and refrigerate.
After refrigerating for 3-4 hours or overnight, you’ll find a thick and smooth pear curd with the delicious mellow flavour of fresh pears!
Hint: while heating your curd in the microwave, to check if is cooked enough to thicken up properly, look out for a glossy sheen and check that it coats the back of a spoon. If you can’t see this yet, cook for another minute.
Try not to overcook the curd though, as this can result in a lumpy texture and separation. As soon as it coats the spoon, you can stop heating.
Top tip
Make sure your pears are in season and fully ripe for best results.
Pears are picked hard and need to ripen off the tree which is why you will find bagged pears in the supermarket marked for ripening at home.
If you ripen them at home this prevents them from getting bruised and damaged before purchase. It also results in a less gritty pear than if they ripened on the tree.
Allow pears time to ripen fully in a well ventilated place in your home, such as on the kitchen counter. Put a banana in the same bowl to aid ripening.
Pears ripen from the inside out, so if the body of a pear feels soft it may well be over-ripe. Instead, check the stem area to see if a pear is ready. When it is soft, the pear is ready.
Variations
Pear is enhanced by the addition of a few different flavours, why not try one of these twists on pear curd:
- Pear and ginger – add a teaspoon of ground ginger or crystallised ginger to the pears before pureeing to add a little fiery heat.
- Pear and blackberry – add a handful of blackberries to the pears before pureeing.
- Pear and caramel – add a couple of tablespoons of caramel sauce (dulce de leche) to the pears before pureeing. Taste and adjust the quantity of caramel to suit your palate!
Serving suggestions
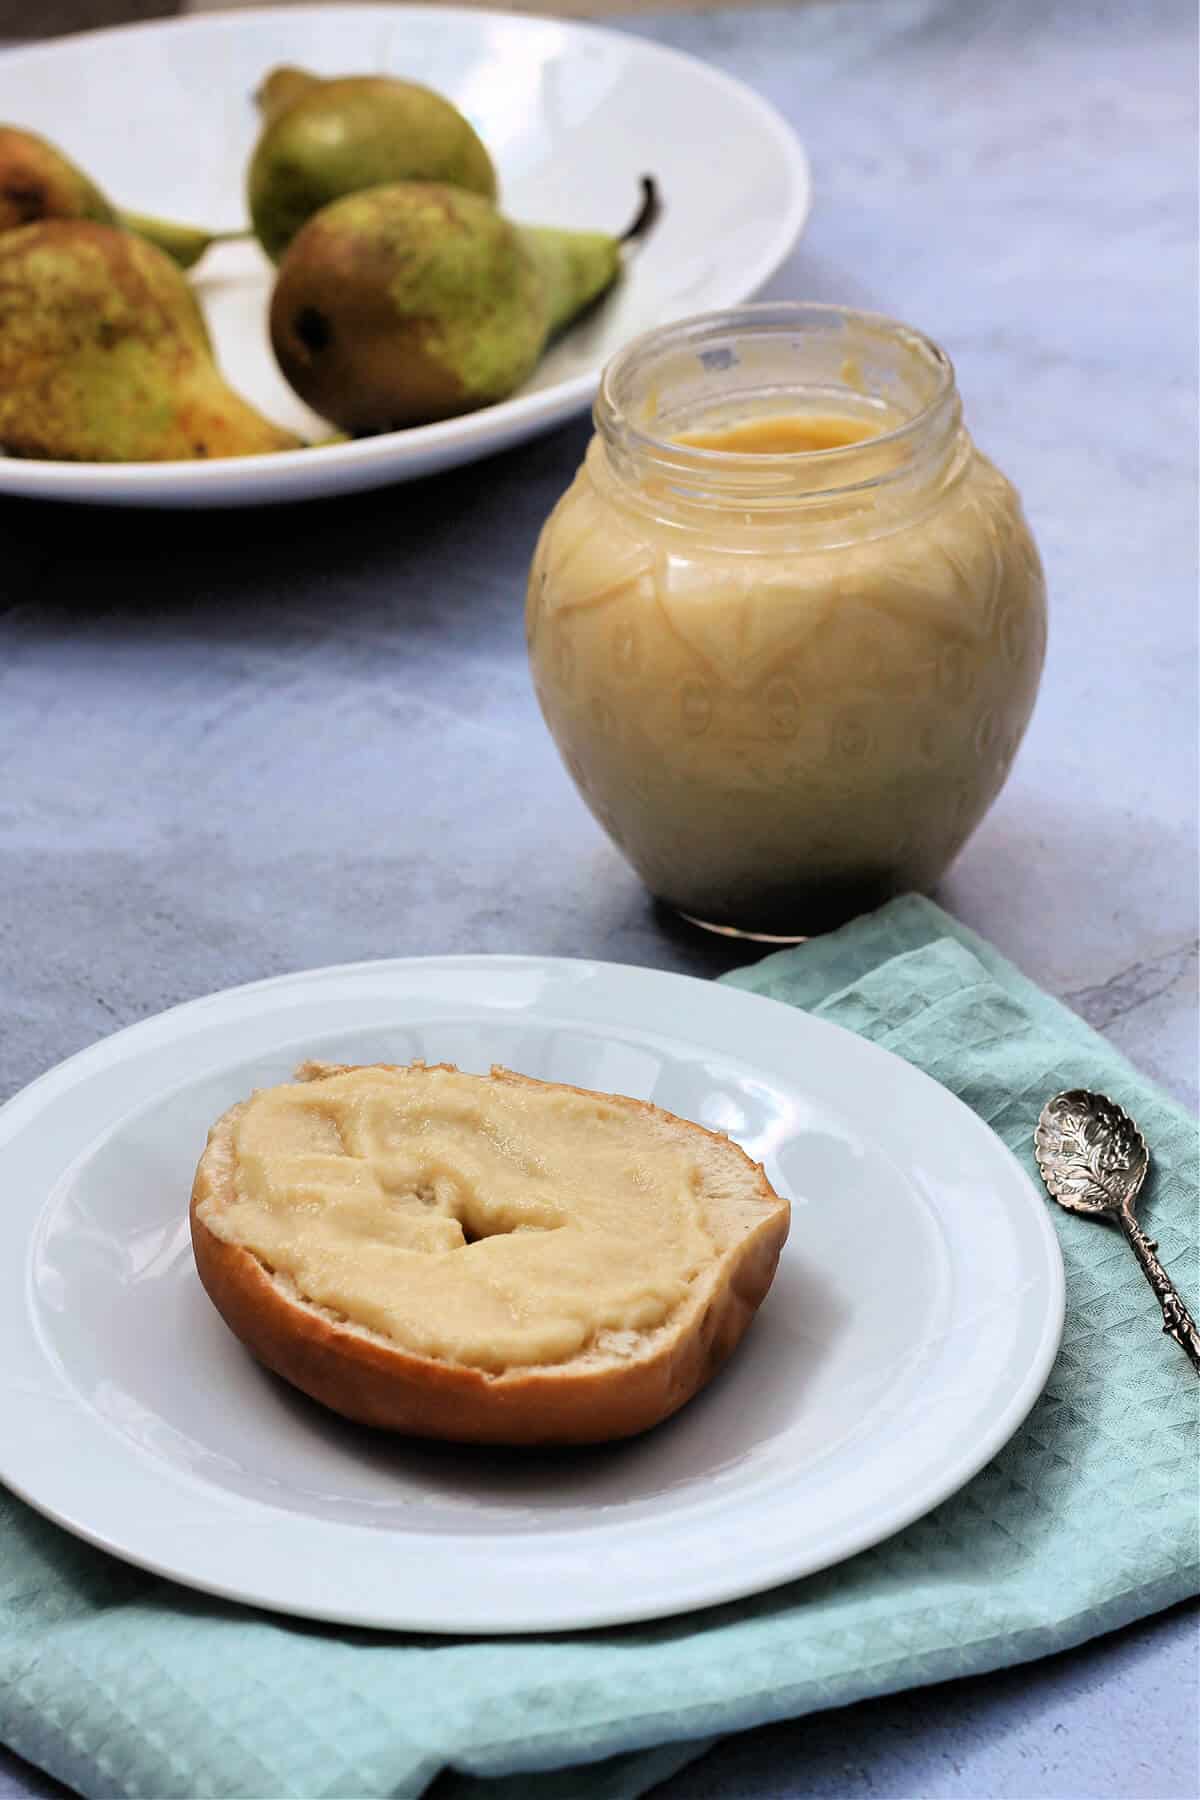
Pear curd can be used as a spread on bread, toast or bagels, or to fill cakes.
It can also be used as a filling in desserts like tarts, scones or as a topping for pancakes or stirred into yoghurt.
Storage
Store the pear curd in a sealed jar in the fridge for 1-2 weeks.
Freezing – pear curd can be frozen in a lidded plastic container for up to a year. Why not freeze it in an ice cube tray so you can use small amounts of curd at a time.
FAQ
Fruit curd can be made with pretty much any fruit, either by using the juice or the pureed fruit. In this recipe we used pureed ripe pears for the fruit part, along with the traditional fruit curd ingredients of butter, eggs and sugar. The traditional varieties of fruit curd are lemon curd and lime curd but lots of other fruits work well too!
Since it does not contain any preservatives (unlike jarred fruit curd you buy in shops), homemade pear curd only lasts for 1-2 weeks in the fridge.
Pears contain stone cells, which produce that gritty, grainy texture. They are cells with a thick cell wall that develop in pears when they ripen on the tree. This is the reason pears are picked before they are ripe, to avoid too many stone cells which would make the pears even more gritty.
Looking for more fruit curd recipes? Try these:
Recipe
Pear Curd
An easy recipe to make a delicious smooth pear curd in the microwave, to enjoy spread on toast, as a cake filling, stirred into yoghurt or in tarts or scones. Makes a single jar.
Print Rate Save Saved!Servings: 16
Calories: 70kcal
Ingredients
- 420 g pear flesh 4 to 5 medium-sized Conference pears
- 1 tbsp lemon juice freshly squeezed
- 50 g butter
- 2 large eggs
- 100 g caster sugar superfine sugar
Instructions
Choose ripe pears, preferably without bruising. Trim, peel and core the pears, and slice into quarters. Squeeze over the juice of half a lemon (1 tbsp) to prevent the pears going brown.
420 g pear flesh, 1 tbsp lemon juice
Puree the pear flesh in a power blender until smooth. I use a power blender and pulse for 20 seconds (this may take longer depending on your blender). Look for an even liquid consistency with no lumps.
Add the caster sugar, butter and eggs. Stir.
50 g butter, 100 g caster sugar, 2 large eggs
- Place the bowl in the microwave and heat on high for 1 minute, then remove and stir well. Repeat 5-6 further times, each time microwaving then stirring/beating well.The resulting pear curd should be thick and smooth.
- Strain the curd through a plastic sieve to remove any small lumps of cooked egg and any gritty texture.Pour into a sterilised glass jar, put on the lid and refrigerate.
After refrigerating for 3-4 hours or overnight, you’ll find a thick and smooth pear curd with the delicious mellow flavour of fresh pears!
Hint: while heating your curd in the microwave, to check if is cooked enough to thicken up properly, look out for a glossy sheen and check that it coats the back of a spoon. If not, heat it for an additional minute.
Notes
- Pear and ginger – add a teaspoon of ground ginger or crystallised ginger to the pears before pureeing to add a little fiery heat.
- Pear and blackberry – add a handful of blackberries to the pears before pureeing.
- Pear and caramel – add a couple of tablespoons of caramel sauce (dulce de leche) to the pears before pureeing. Taste and adjust the quantity of caramel to suit your palate!
#Pear #Curd #BakingQueen74