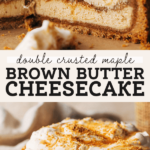
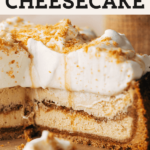
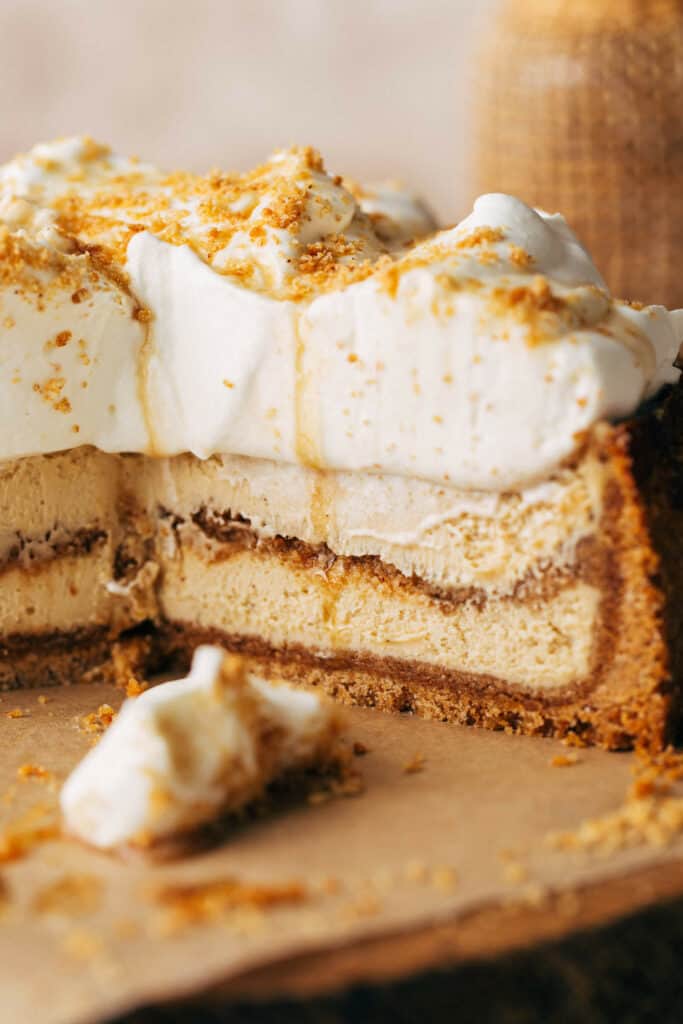
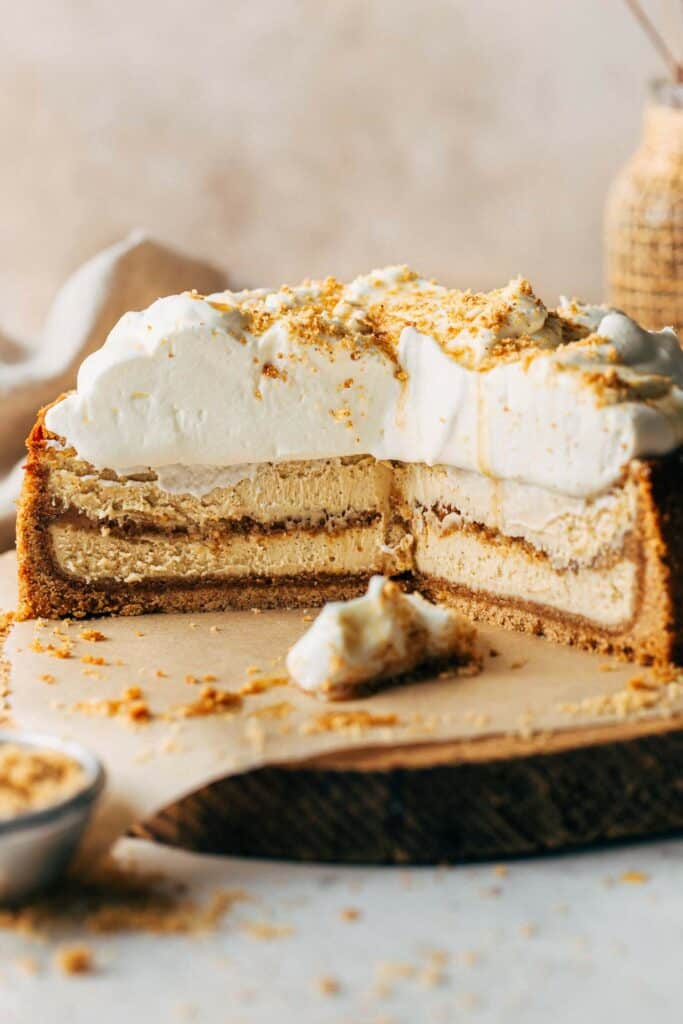
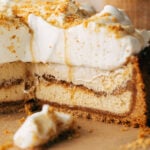
This maple brown butter cheesecake might just be the best cheesecake recipe I’ve ever shared. Creamy cheesecake is flavored with pure maple syrup and brown butter and baked in a brown butter graham cracker crust. BUT WAIT! To bring in even more flavor, and to pay homage to the best part of any good cheesecake, a second layer of brown butter graham cracker crust is baked in the center. Yes, a double decker graham cracker crust!
What makes this brown butter cheesecake so good?
So much. There’s so much to say about this recipe! So let’s start from the bottom – the crust.
This graham cracker crust recipe is my tried and true as I use it for ALL of my cheesecakes! It has the perfect ratio of graham cracker to sugar to butter and it’s just the right amount to cover the bottom and sides of a cheesecake.
So to bring in that brown butter flavor, the crust is made with just that. It adds a delicious nutty note to the sweet crust and pairs perfectly for the batter that bakes inside.
Speaking of, this cheesecake is insanely creamy as it’s sweetened with a cup of pure maple syrup. The liquid sugar creates an extra smooth cheesecake with loads of maple flavor.
As for the brown butter, having it in JUST the crust wasn’t quite enough for me but adding too much butter to the batter can prevent it from baking through.
The solution – the dark brown butter bits are added to the cheesecake since this is where all the flavor is! The liquid butter and brown butter bits are separated to leave behind a spoonful of flavor which is just enough to round out the batter.
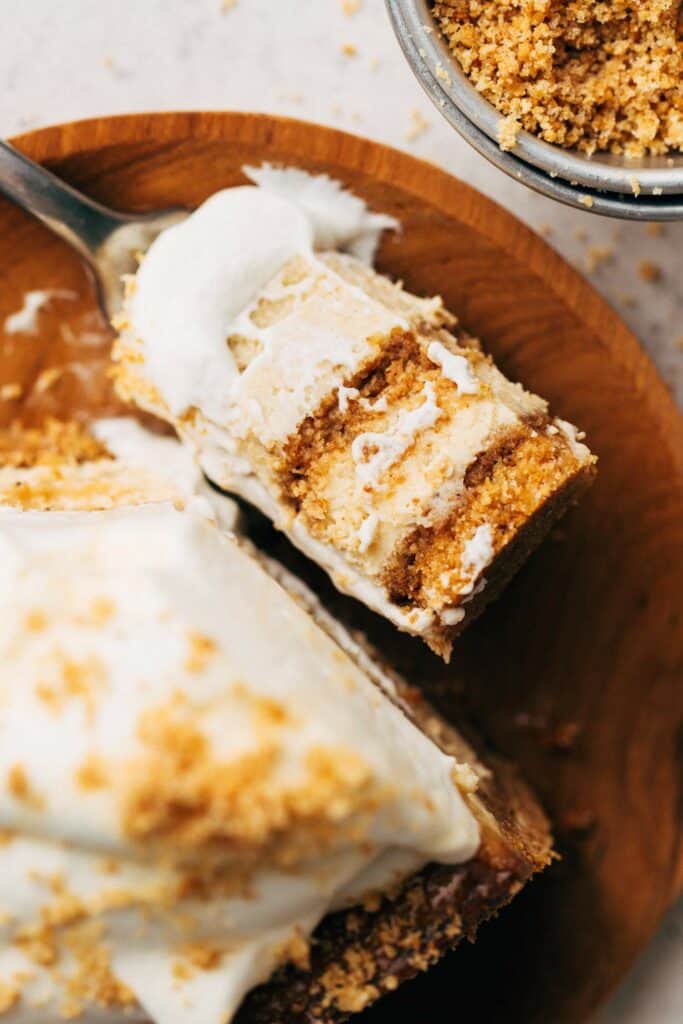
Last but not least, the crust…again. Not only does it cover the bottom and sides of the cheesecake, but another layer is baked into the center of the entire thing. Excuse me while I resists the urge to do this to every single cheesecake from here on out.
How to make brown butter
Making brown butter is very easy to do, but is also very easy to burn. I walk you through how to brown butter more in depth in a separate post, but here are a few tips to follow:
- Use a heavy bottomed saucepan. This prevents the butter from browning too quickly.
- Melt the butter over medium heat. Stir occasionally at first.
- As the butter melts, you’ll see phases of bubbles. First, there will be a few clear bubbles. As the butter heats, more and more bubbles will appear.
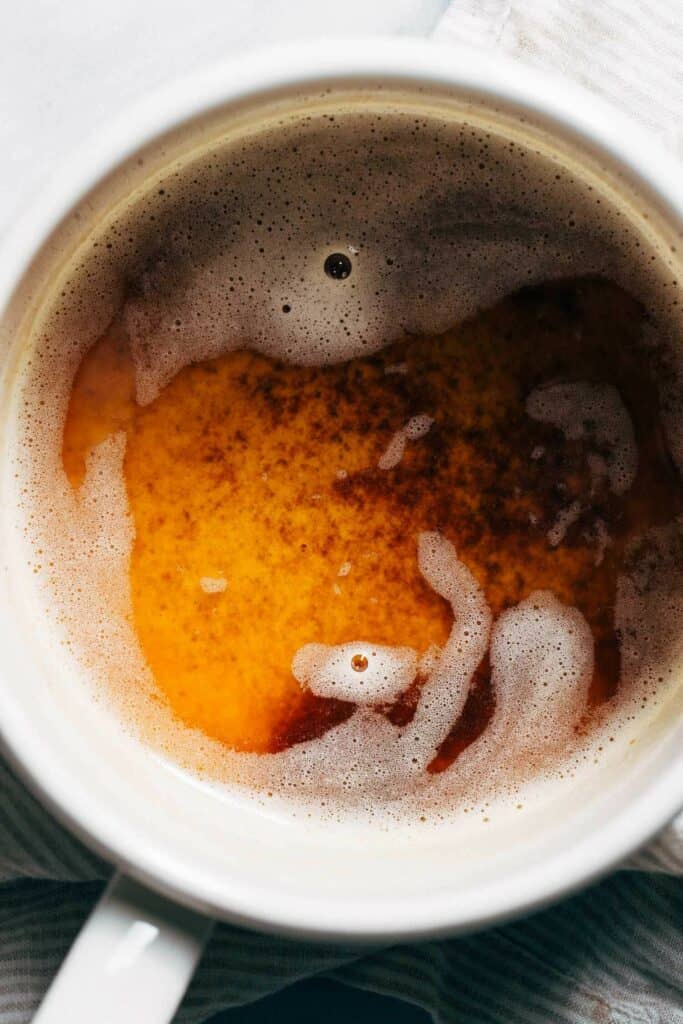
- After about 5 minutes, the bubbles will start to turn into a foam. This is when you want to switch to stirring constantly.
- Once the foam forms, the browning process will happen fast. Keep stirring to not only keep the milk solids from burning on the bottom of the pan, but to also push away the foam so you can see the butter.
- When the butter turns an amber color and you start to see little brown flecks mixing into the foam, the butter is ready.
- Remove from heat and pour into a heat safe container.
- Scrape down the bottom of the pan because that’s where all the brown bits like to stick. Don’t leave those behind! They hold all the flavor.
By the end of this recipe you’ll be a brown butter pro because we go through the browning process twice – once for the crust and another for the cheesecake.
The brown butter for the crust is simply poured into a wide and shallow dish to speed up the cooling process. We don’t want to pour piping hot butter into the graham crackers and sugar as this could cause everything to dissolve rapidly.
For the cheesecake, this brown butter is specifically poured into a measuring glass. This is so that it’s easy to see the separation of butter to browned milk solids as they sink to the bottom of the glass. The butter is then poured out to leave behind the brown bits. A spoonful is all that’s needed to add tons of brown butter flavor to the cheesecake.
How to make brown butter maple cheesecake
Cheesecake can be tricky, especially when baking with an aim towards perfection. It must be super creamy with a smooth and crack-free surface. To ensure yours turns out just the same, here are my top cheesecake baking tips:
- Cream Cheese – If you can, always use Philadelphia full fat cream cheese. It provides the BEST flavor and texture. This is not sponsored, it’s just the only cream cheese I’ll ever use. But if you can’t get ahold of Philadelphia brand, at least go for full fat cream cheese. Reduced fat just won’t be as creamy!
- Room Temperature Ingredients – Before starting, make sure all of the refrigerated ingredients are at room temperature…especially the cream cheese. This prevents lumps and over mixing (adding too much air to the batter can create cracks).
- Low & Slow – Always keep the mixer on LOW speed, whether it’s a hand or a stand mixer (although stand is preferred). This means the mixing process will take a little bit longer, but it also ensures the cheesecake turns out smooth and crack-free.
- Easy Water Bath – Most importantly, always bake cheesecake in a water bath. Place a roast pan on the bottom rack of the oven and start a pot of boiling water on the stove top. When you’re ready to bake the cheesecake, pour the boiling water into the roast pan and then place the cheesecake on the middle rack above. Baking in a moist environment prevents the cheesecake from drying out and cracking.
- Jiggle Test – To make sure the cheesecake is done, crack open the door and nudge the pan. If the center wobbles like a bowl of milk, it’s not done. If it jiggles like jello, it’s ready.
- Gradual Cooling – I’ll cover this in more detail later in the post, but allowing the cheesecake to slowly come back to room temperature provides the perfect texture and stops any cracks from forming.
- Edges – When the cheesecake is finally removed from the oven, run a sharp paring knife around the top edge of the cheesecake to release it from the sides of the pan. As the cheesecake cools, it will shrink and if it’s still stuck to the sides of the pan this can cause cracks. This doesn’t always happen, but it’s just another step to ensure a smooth surface.
For even more tips on how to bake the best cheesecakes, see my post for the BEST classic cheesecake recipe.
Chilling the brown butter cheesecake
This is a crucial step that is often overlooked when baking cheesecake. Of course the bake is important, but what happens AFTER the oven shuts off is just as pressing.
When the cheesecake is done, turn the oven off and crack open the oven door with the cheesecake still inside. This allows it to come back to room temperature very slowly, while also gently baking the center all the way through.
Leave the cheesecake in the oven for 45 mins – 1 hour before taking it out. This process prevents the cheesecake from cracking. If you take it out right when it’s done, it will cool too fast. As the cheesecake cools, it shrinks and if this process happens too quickly, a crack will form down the center. Taking it out too soon could also leave you with an under baked center.
After the hour is up, take the cheesecake out of the oven and leave it at room temperature for about 30 minutes.
Then transfer the cheesecake in the refrigerator for at least 4 hours but preferably overnight. This helps the cheesecake completely settle, creating a super creamy texture that’s easy to slice.
Can this cheesecake be made gluten free?
Absolutely, as the only ingredient that needs to be subbed is the graham crackers. Nowadays, it’s easy to find gluten free graham crackers.
Do I have to include the whipped cream?
Nope, the cheesecake is just as delicious with or without it! A quick and easy option is to use store-bought whipped cream and serve it on the side. This way, people can choose just how much they want with their slice of maple brown butter cheesecake.
For more cheesecake recipes, check out my:
Make sure to tag me @butternutbakery on Instagram and leave a review below if you make this brown butter cheesecake. To pin this recipe and save it for later, you can use the button on the recipe card, the buttons above or below this post, or on any of the photos above. Happy baking!
Watch how to make this brown butter cheesecake:
Maple Brown Butter Cheesecake
Total Time: 8 hours 15 minutes
Yield: 10-12 slices
Description
This brown butter cheesecake is LIFE CHANGING. It’s a maple and brown butter cheesecake with a brown butter graham cracker crust. The crust covers the bottom, sides, and is baked as a double layer in the center of the cheesecake!
Brown Butter Graham Cracker Crust
- 14 tbsp (196g) unsalted butter
- 3 cups (420g) ground graham crackers (about 3 sleeves), reg or gluten free
- 3/4 cup (150g) granulated sugar
- 1/2 tsp ground cinnamon
- Pinch of salt
Maple Brown Butter Cheesecake
- 6 tbsp unsalted butter
- 4 8oz blocks full fat Philadelphia cream cheese, room temp
- 1/2 cup (100g) dark brown sugar, packed
- 2 tbsp cornstarch
- 1 cup (325g) pure maple syrup*
- 3 large eggs + 1 egg yolk, room temp
- 1 tbsp vanilla extract
- 1 cup (240g) sour cream, room temp
Toppings
- 2 cups (480ml) heavy whipping cream
- 1 tbsp powdered sugar
- Extra graham cracker crust, for sprinkling
- Pure maple syrup, to drizzle
Instructions
Brown Butter Graham Cracker Crust
- Preheat the oven to 350F. Lightly spray the entire inside of a 9″ springform pan with nonstick spray and line the bottom with parchment paper.
- Next, brown the butter. Add 14 tablespoons of butter to a saucepan over medium heat.
- Melt and stir until the butter goes from loud and bubbly to quiet and frothy. When it goes quiet, the browning process will happen fast so keep stirring until the butter turns into an amber color and gives off a nutty aroma.
- Pour the butter into a wide and shallow dish to help it cool faster. Make sure to scrape in all the brown bits at the bottom of the pot.
- While that butter cools, brown the second round of brown butter for the cheesecake. Repeat the same process with the 6 tablespoons of butter allotted for the cheesecake.
- Pour this brown butter into a measuring glass and place it in the refrigerator.
- Now back to the crust. Combine the graham cracker crumbs, sugar, cinnamon, and salt in a large bowl.
- Pour in the 14 tablespoons of brown butter and stir to combine.
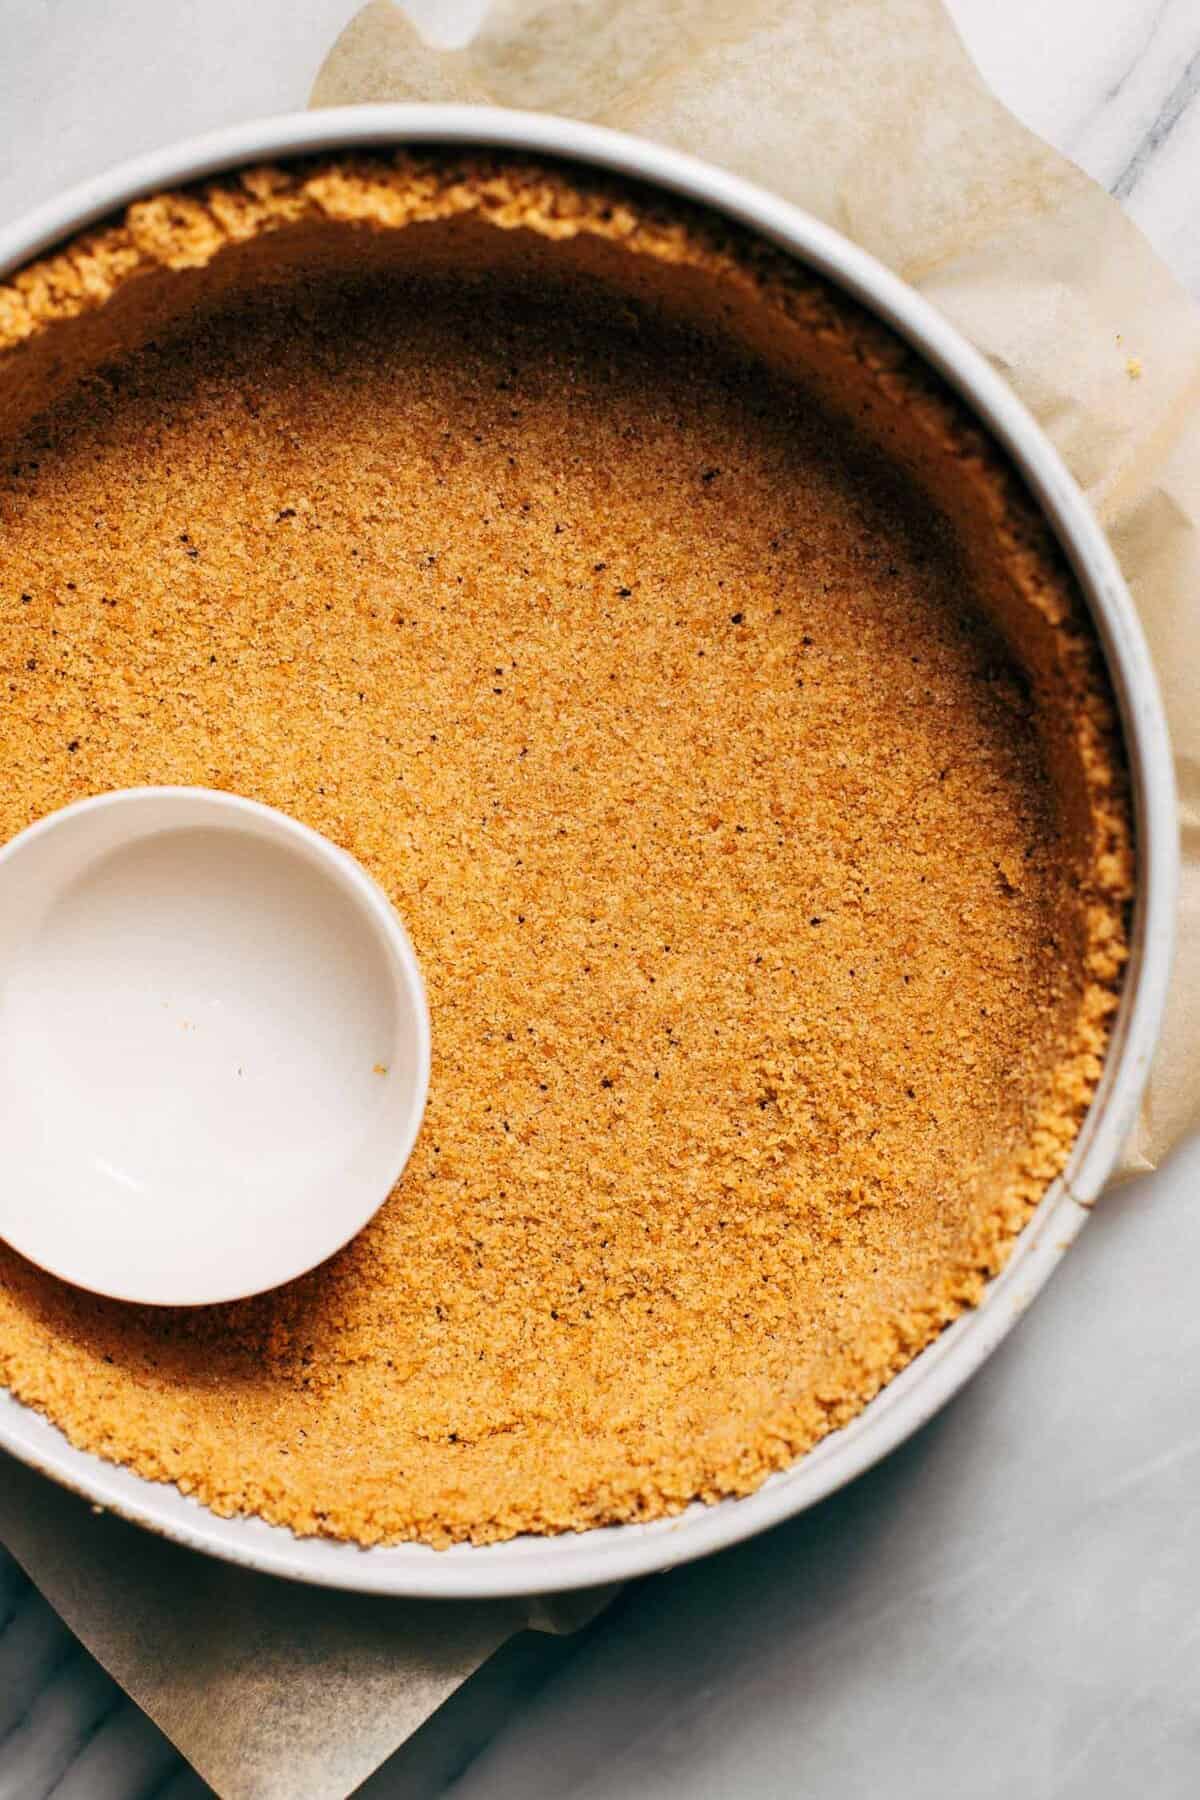
- Transfer 1/3 of the graham cracker mixture into a separate bowl and set aside. Dump the remaining 2/3 of crust into the springform pan.
- Using an object with a flat bottom, like a jar or measuring cup, press the crust into the bottom and up the sides of the pan.
- Bake for 8 minutes and let it sit a room temperature to cool while we make the cheesecake.
Maple Brown Butter Cheesecake
- Reduce the oven temperature to 325F. Position one oven rack at the bottom of the oven and another in the center. Place a large roast pan on the bottom rack.
- Using a hand or stand mixer with the paddle attachment, add the room temperature cream cheese, brown sugar, and cornstarch.
- Mix on low speed until smooth, stopping to scrape down the bowl as needed.
- Once smooth and combined, keep the mixer running on low speed and slowly pour in the maple syrup.
- Halfway through the maple syrup, stop and scrape down the bowl. Give it a good mix and then continue on with the rest of the maple syrup.
- Switching gears – pause and fill a large pot with 6-7 cups of water. Place it on the stovetop over high heat and bring to a boil. This will be for the water bath when the cheesecake goes in the oven.
- Now for the brown butter that’s been sitting in the refrigerator – you should notice that the brown bits have sunk to the bottom of the glass. That’s where all of the delicious brown butter flavor is so this is what will be going into the cheesecake.
- Very gently pour out the golden butter into a separate container, leaving behind the brown bits at the bottom of the glass.
- Scoop the brown bits into the cheesecake. It should be a spoonful amount. Mix on low speed to combine, followed by the vanilla extract.
- With the mixer running on low speed, mix in the eggs one at a time.
- Once smooth, mix in the sour cream on low speed.
- Scrape down the bowl and give the batter one last good mix by hand.
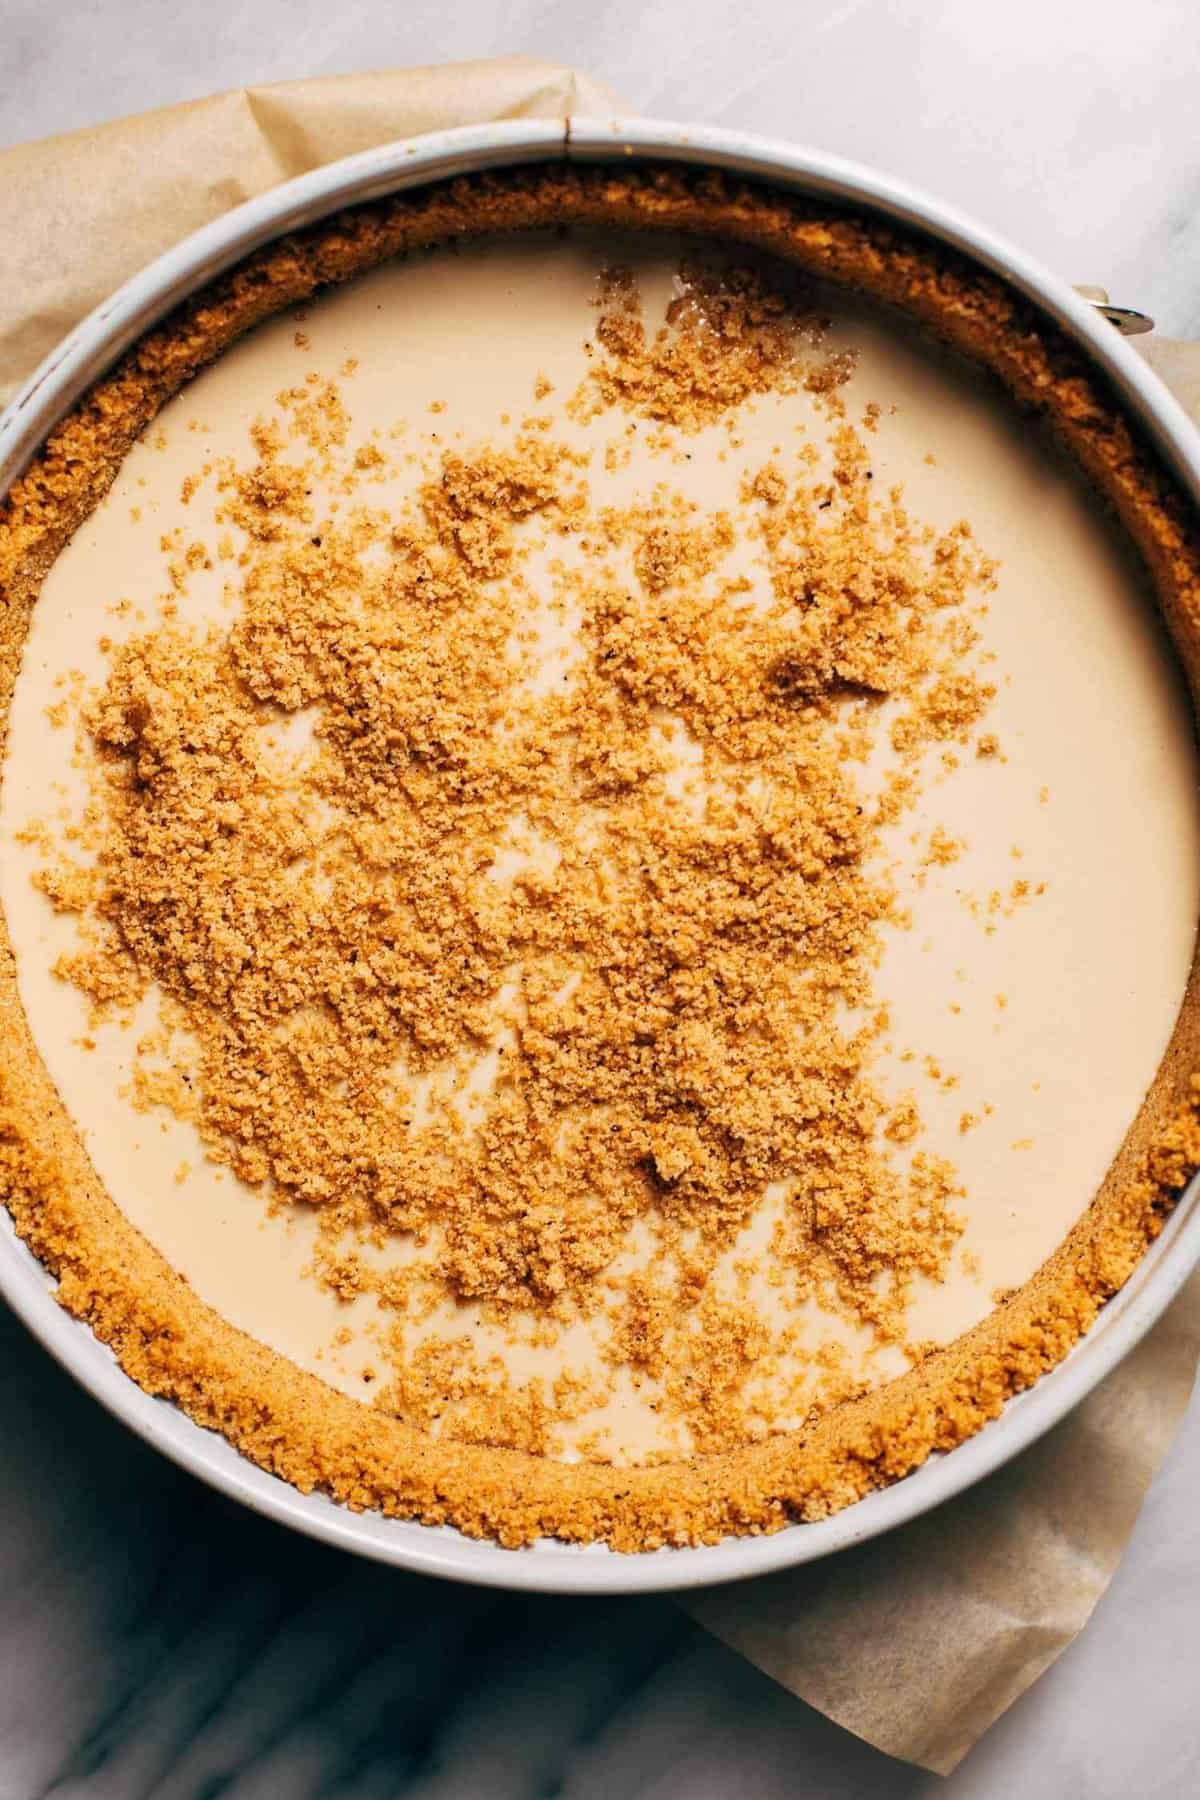
- Pour half of the batter into the cheesecake crust.
- Taking that bowl of excess crust from earlier, gently sprinkle all but 3 tablespoons of the crust on top of the cheesecake. It should completely cover the surface. Gently use your hand to brush around the crust to make it as even as possible. (Place the remaining 3 tablespoons of crust in the refrigerator).
- With the remaining cheesecake batter, gently drizzle the batter over the graham cracker surface. Keep the stream moving all around the surface because if you pour the batter in one single spot, it will disrupt the graham cracker layer in the center.
- Now going over to the oven, gently pour the boiling water into the roast pan on the bottom rack. Place the cheesecake on the middle rack just above the water bath and close the oven door.
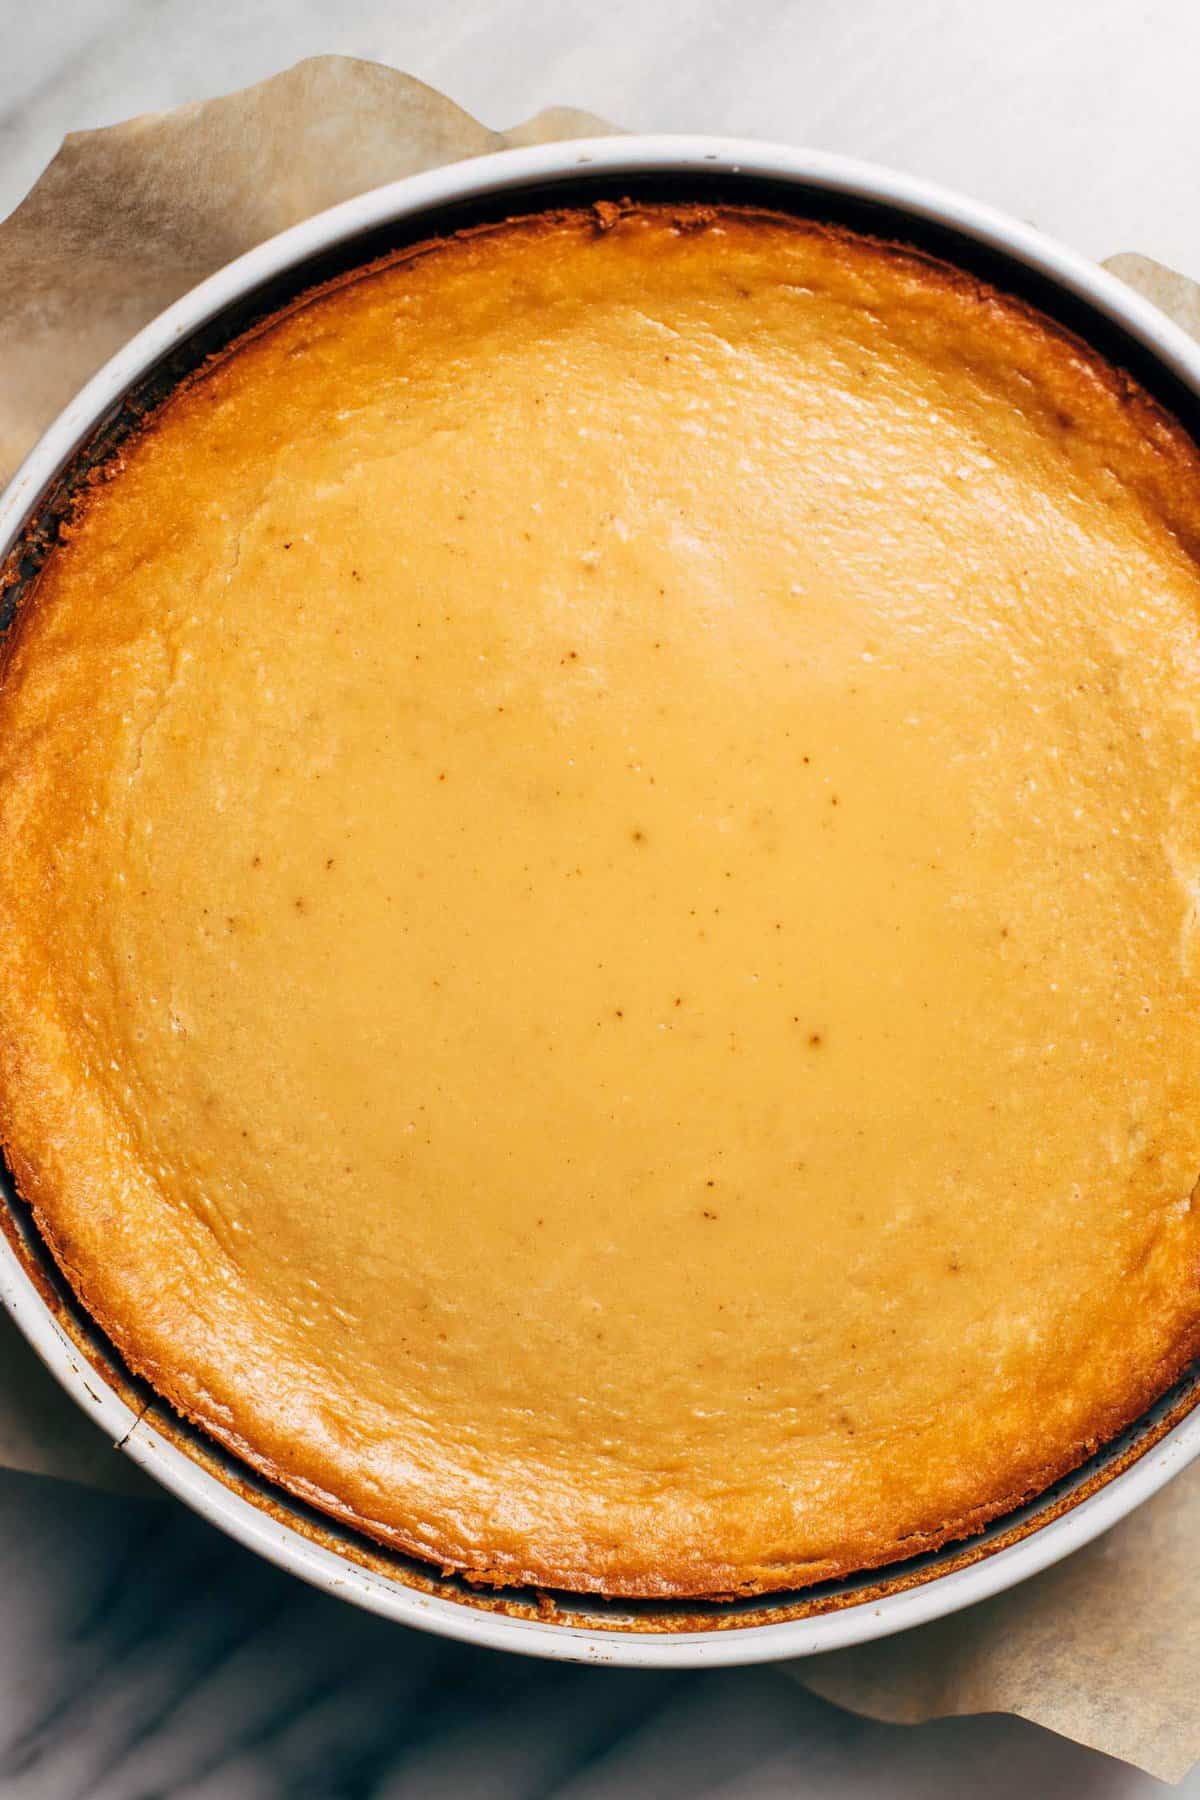
- Bake for 1 hour and 30 minutes. The cheesecake should be well puffed with golden edges and a lighter center.
- Turn the oven off and crack open the oven door. Leave the cheesecake in the oven for 45 minutes.
- After 45 minutes, remove the cheesecake and let it rest at room temperature for another 30 minutes.
- Then transfer the cheesecake (uncovered) to the refrigerator to chill overnight.
Toppings
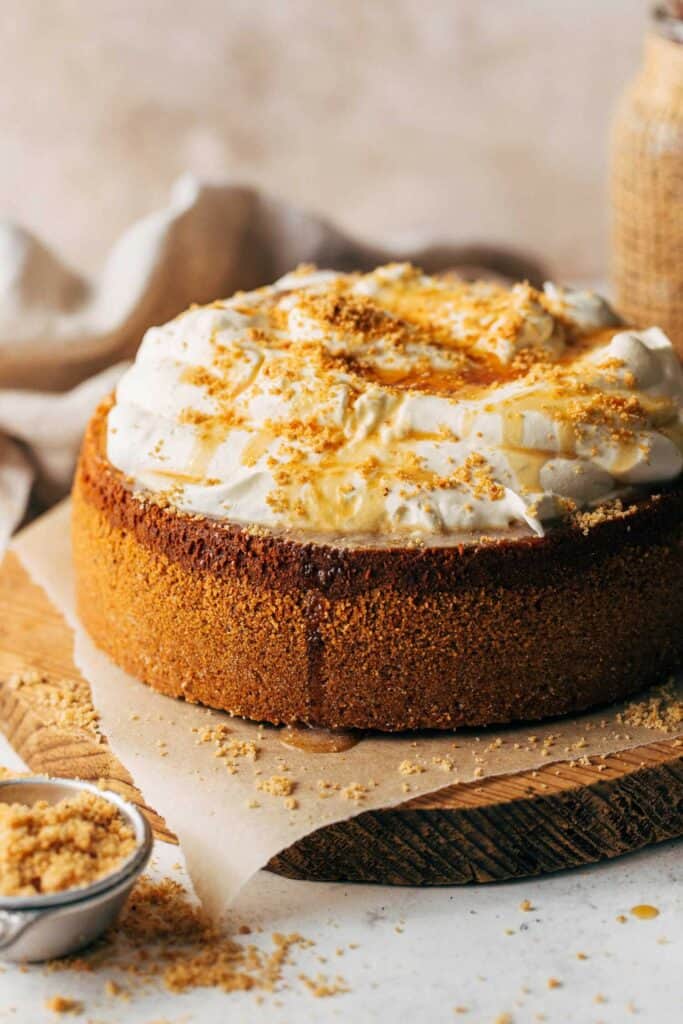
- Once the cheesecake has chilled, remove the springform ring and transfer the cheesecake to your desired serving plate.
- Pour the heavy cream into a large bowl using a hand or stand mixer with the whisk attachment.
- Whip on high speed until you reach soft peaks, adding the powdered sugar about halfway through.
- Top the cheesecake with a pile of whipped cream and sprinkle with the remaining crust. Drizzle with maple syrup if desired. Enjoy!
Notes
*PURE MAPLE SYRUP – Make sure to use pure maple syrup, where the only ingredient on the bottle is maple syrup. Don’t use pancake syrup as this is mainly just corn syrup and flavorings. For the best flavor and consistency, use the real stuff.
- Prep Time: 45 minutes
- Chill Time: 6 hours
- Cook Time: 1 hour 30 minutes
- Category: Dessert
- Method: Baking
- Cuisine: American
Keywords: maple cheesecake, brown butter cheesecake, brown butter graham cracker crust, fall cheesecake, maple cheesecake recipe

#Maple #Brown #Butter #Cheesecake #Butternut #Bakery